Thursday 29 January 2015

Create a scene

Hello Folks

Well the promised snow has arrived and my youngest is very excited. I only hope it lasts until he comes out of school and he can go and play in it.
Today's card features a die my children bought me for Christmas. I wanted to try the die out so had a rummage through my scrap box and came up with this -
The die is a create - a - scene die from Xcut (Docrafts). I cut all the dies in the set from red, black and cream card, decoupaged it up and matted and layered it up with silver mirriboard, red card and black centura pearl. I then attached it to a 8 inch square card blank.
I wrapped a piece of red ribbon and added a bow to the bottom of the card.
 I added a sentiment using Spellbinder's sentiments 2 cut from silver mirri and to finish added black pearls as shown.
 A very quick, simple but very effective card.

Take care in this weather

Lesley

Wednesday 28 January 2015

Tickled pink

Hello folks

Brrrrrrr it's cold isn't. I hope you are all warm and snug somewhere safe. The wind is whistling round the bay window in my craft room and the hailstones are rattling on the window. Yuck!
This is an image I coloured in a while ago but wasn't sure what to do with it. I was surfing the ole tinterweb when I came across the 
In The Pink challenge blog who's current challenge is pink and pearly. So pink and pearls it was -
I began by punching one edge of a 6 inch square card blank with a Tonic rose border punch. As the card blank was a linen one I added a piece of linen card stock to the inside of the card too. I then cut two pieces of pink core'dinations card, ran them through a Tattered Lace butterflies embossing folder (a Christmas present from my hubby) and sanded them both back to reveal the core. I then attached one to the outside of the card and one inside too.
Inside the card.
I die cut two butterfly borders (from Tattered Lace), matted them onto some white linen card and then attached them to the card base as shown.

The image is from Saturated Canary and is called Jeans and a Tee which I coloured it with the following Spectrum Noir pens and pencils -
  • Hair - TN7, TN8, EB5 and 104
  • Skin - FS1, FS3, TN2, CR1 and 009
  • Lips - CR5
  • Tee - PL1, BP2, BP6 and 039
  • Jeans - BGR1, BGR2, BGR4 and 073
  • Flower - DR1, DR5, DR7, CG1, DG2, DG3 and 058
  • Sky - TB1
I cut the image out using Spellbinder's labels 22, matted it onto a faux nestie cut from pink core'dinations and then matted it onto a Spellbinder's decorative labels 22 cut from white linen card. I attached it to the front of the card with foam pads.
To finish I added pearls to the centres of the butterflies on the border and added a butterfly charm from the Ribbon Girl.

I would like to enter this card into the following challenge -
http://inthepinkchallenge.blogspot.co.uk - Challenge 61 - Pink and pearlie.html

Thank you for stopping by

Lesley


Tuesday 27 January 2015

Spring mice

Good morning folks.

I just knew I wouldn't be able to stay away from my craft room for too long. I needed to de-stress and what better way than a spot of colouring.
I began by cutting a Tonic affections square base die (using the outer die only) from a paper from LOTV's Promises pad and then matting it onto a piece of green paper from LOTV's Promises solids pad. I cut a spellbinder's butterfly corner from another of the papers and attached it to the centre top of the card base.
 I added a piece of lace (from the Ribbon Girl) along one side and attached the whole thing to a 6inch square, scalloped card blank.

The image is Spring dip from Joanna Sheen's House Mouse stamp range which I coloured with the following Promarkers -
  • mice - blush, satin, coral, raw sienna, cocoa, tan and cinnamon
  • flowers - tea green, pastel green, mint green, lavender, orchid and amethyst
  • sky - pastel blue and denim blue
I cut the image out using a Spellbinder's rectangle nestie and attached it to a Spellbinder's Fleur de lis rectangle cut from another piece of green paper. I then attached it to the card base with foam pads.
I cut a Happy Birthday sentiment using Spellbinder's sentiments 3 and attached to the card as shown.
I then cut several flowers using Spellbinder's Pretty petals B and sprigs die and arranged as shown. (I did prune the sprigs slightly).
To finish I coloured a pearl with a orchid Promarker and attached it to the centre of one of the flowers.
I would like to enter this card into the following challenge -
http://allsortschallenge.blogspot.co.uk - week 295 - lace and pearls.html

Thanks for stopping by

Lesley

Saturday 24 January 2015

Just when you thought......

Hi everyone.

Just when you thought you'd got rid of me I'm back. This is a very quick post about the chances of winning some fab candy courtesy of Brenda at Floral Fantasies.
It runs until Friday February 13th (lucky for someone). So pop over to Brenda's blog (http://stamping-fantasies.blogspot.co.uk/2015/01/recycling-candy.html) for  a chance to win.

Off to conjugate some verbs now. Wish me luck.

Lesley 

Friday 23 January 2015

AWOL

Good Friday Evening folks

I hope this post finds you all well and managing to hide indoors from this cold winter weather we have been having.

I am afraid my posts are going to be rather infrequent from now on as I have just begun a distance learning qualification which requires a 120 hours of internet work. So my crafting time is going to be limited as I have to complete the online course before May.

I will try to have a crafty break here and there so keeping popping over to see what I am upto or why not become a follower.

Well that's me for a while. I am off to get to grips with English grammar - wish me luck!

Lesley

Monday 19 January 2015

Hobbies

Hello Folks

A late post from me tonight.
The challenge this week at I love Promarkers in Hobbies. This caused me to rummage through my stamps until I found this House Mouse one from Joanna Sheen. It was House Mouse which started my stamping duty and I have not used them for such a long time which is a shame because I really love these cute little mice. Anyway enough of my waffling, here is my card - 
For some reason the ribbon colour is completely different in the photo from in real life. I have tried several times to get the photo right but due to the late night I've given up - sorry.
I think I will just give you a quick run down of the products I have used tonight - the old eyesight is beginning to fail now.
  • stamp - House Mouse - mice and crafty
  • Promarkers - cinnamon, tan, coral, raw sienna, cocoa, blush, dusky pink, pink lobster, maroon, pastel blue, warm grey 1 and warm grey 3.
  • Tonic dies - Rose circle doily and square base Affections die
  • pink core'dinations
  • papers - LOTV one Birdie Lane
  • LOTV's sentiment tags set (set 24)
  • wool charm and ribbon from my stash


I would like to enter this card into the following challenges - 
http://ilovepromarkers.blogspot.co.uk - Challenge 252 - Hobbies

Thank you for stopping by

Lesley

Saturday 17 January 2015

Heart balloons

Good Saturday afternoon to you all

The challenge at Penny Black and more is embossing, stencils or masks and here is my card for the challenge - 
I began by covering a 5 x 7 inch card blank with some red coredinations and then embossing a piece of white centura pearl with a clouds embossing folder from Crafter's Companion.
Not sure how clear this photo is but hopefully you should be able to make out the clouds.
The image is a Penny Black one called Hedgehog Kisses which I treated myself to after Christmas.
I coloured the image with the following Spectrum Noir pens and pencils - 
  • balloons - CR7, CR9, CR11, 026 and blender
  • hedgehogs - FS1, FS6, FS8, FS9, EB4, EB6, EB8, 104, 004 and 009
  • sky - IB1 and 061
I cut the image out and matted it onto a Spellbinder's Reflective Moments cut from red Core'dinations. I then attached the topper to the card base with foam pads.
The whole thing looked a little clean and simple for my liking so I added a very messy bow (mine never look neat)  and a heart charm (both from the Ribbon Girl).

I would like to enter this card into the following challenges - 
http://pennyblackatallsorts.blogspot.co.uk - January challenge -stencils, masks and embossing folders

Thank you for stopping by 

Lesley


Sunday 11 January 2015

So special

Good afternoon folks.

How's your Sunday going. I hope the stormy winds have not caused too much damage in your area. At least it has stopped raining here now.
The challenge at Allsorts this week is new and cute and you can't get much cuter than a Penny Black Hedgie. Also he is a new stamp which covers the new part. This is the card I have made for the challenge - 
Apologies for the photo quality, blame the horrible, dull January weather
I began by embossing a piece of white centura pearl with Penny Black's Dotlets stencil and inking through the stencil with tumbled glass distress ink. I then matted it onto a piece of pastel blue centura pearl and wrapped a piece of blue ribbon (from The Hobby House) around the centre. I attached the whole thing to a 6 inch scalloped card blank.
The image is Penny Black's In a nutshell which I stamped onto watercolour card and then coloured with the following Spectrum Noir pencils - 
  • shell - 089, 091 and 095
  • flower - 056, 058, 047, 015, 020, 022, 065 and 068
  • Hedgie - 003, 005, 004, 009, 099, 096 and 104
  • sky - 066 and 112
I cut the image out with a Spellbinder's oval nestie, inked whilst still in the die with tumbled glass distress ink and then matted onto a Spellbinder's lacey oval cut from pastel blue centura pearl. I attached it to the card with foam pads.

I attached a piece of blue baker's twine (from the Ribbon Girl) to the top of the card, cut 2 Penny Black pennants from pastel blue centura pearl and then snipped them into singles. I then attached them to the baker's twine and added blue gems (from the Ribbon Girl) to the joins.
I stamped a sentiment from LOTV's sentiment tags onto watercolour card, cut it out and then arranged it at the bottom corner of the card with flowers from the Ribbon Girl.

I would like to enter this card into the following challenges - 
http://allsortschallenge.blogspot.co.uk - week 293 - new and cute
http://pennyblackatallsorts.blogspot.co.uk - January challenge -stencils, masks and embossing folders (stencil)
http://pennybfriendssaturdaychallenge.blogspot.co.uk - January - New (stencil, die and stamp)
Spectrum Noir Facebook challenge - January - anything goes

Thank you for stopping by

Lesley

Wednesday 7 January 2015

A rose for you

Hello folks

Happy Wednesday to you all

Today's card features another new Tilda stamp and a new LOTV paper pad -aren't the colours lovely and summery?
I began by covering a 6 inch square card blank with a green gingham paper from LOTV's Butterfly kisses paper pad. I then cut a Tonic layering square from another paper from the pad, added a strip of another paper and then wrapped a ribbon (from the Hobby House) around the top of the square. I then added a strip of another paper along the side and attached the whole thing to the card base.
The image is Tilda with a big, big rose, a new stamp which fell into my basket whilst browsing the internet during the Christmas holidays. I coloured it with the following Spectrum Noir pens and pencils -
  • skin - FS1, FS3, FS6, CR1 and 089
  • hair - GB9, GB10, EB8 and 104
  • dress, shoes and rose - BP1, BP2, BP3, BP5, BP7, blender, 031, CG1, CG2, LG5 and 085
  • sky - IB1 and 065
  • ground - BG1 and BG3
Santa gave me a new set of pencils so the all the pencils I have used come from either the Primaries, Essentials or Floral tins of Spectrum Noir pencils.
I cut the image out with Spellbinder's Grand decorative ovals one and inked whilst still in the die with tumbled glass distress ink. I made a frame using Spellbinder's Grand decorative labels one and an oval nestie and then attached it to the image. I attached it to the card with foam pads.

I cut several Tonic regal ferns and Doohickey vintage daisies from the papers, layered up the daisies and added a brad to the centre of each, then arranged the ferns and flowers as shown.
I cut a Doohickey small dragonfly, attached it to the card and added a pearl to the body of the dragonfly.
I stamped 2 sentiment tags using LOTV's sentiment tags stamp set 24 and added them to the card as shown and to finish added a heart charm.

Thank you so much for stopping by

Lesley

Monday 5 January 2015

January birthday

Good morning folks

Well it's Monday morning and for me it is back to work. A training day so no children in until tomorrow - a gentle return to work. The fun will start tomorrow.
Today's card is one I made for my friend whose birthday was on 2nd - 
I began by trimming an inch off the front of a 6 inch card blank and then punching it with Tonic's Dotty lace border punch. I then matted and layered the front and inside of the card base with papers from LOTV's Timeless Victorian paper pad.
The image is It's cold outside from Magnolia which I coloured with the following Spectrum Noir pens and pencils - 

  • skin - FS1, FS3, FS6 and 089
  • hair - GB2, GB8 and 087
  • clothes - HB1, HB2, HB3, 078, 080, IG1, IG2 and 117
  • holly - DG2, DG4 and DR7
  • sky - IB1
  • snow - IG1

I added glitter to the snowy areas, cut the image out with Die'namics stitched circle and inked whilst still in the die with tumbled glass distress ink. I then matted it onto a Spellbinder's Stately circle and attached it to to front of the card with Pinflair.
I cut several Tonic royal ferns from one of the papers and added them to the front and inside of the card. I made a couple of flowers using Tonic's petal pairs punches and added a pearl to the centre of each.
To finish I stamped a sentiment from LOTV's sentiment tags set (set 24) and added it to the card as shown.
I would like to enter this card into the following challenge - 
http://allsortschallenge.blogspot.co.uk - week 282 - cold and frosty colours.html
http://craftyhazelnutschristmaschallenge.blogspot.co.uk - challenge 210 - anything goes

Thank you for stopping by

Lesley

Sunday 4 January 2015

Christmas thank yous

Good morning everyone

 I have been pottering in my craftroom this week, not achieved an awful lot but have enjoying playing with my new crafty goodies that Santa brought me.
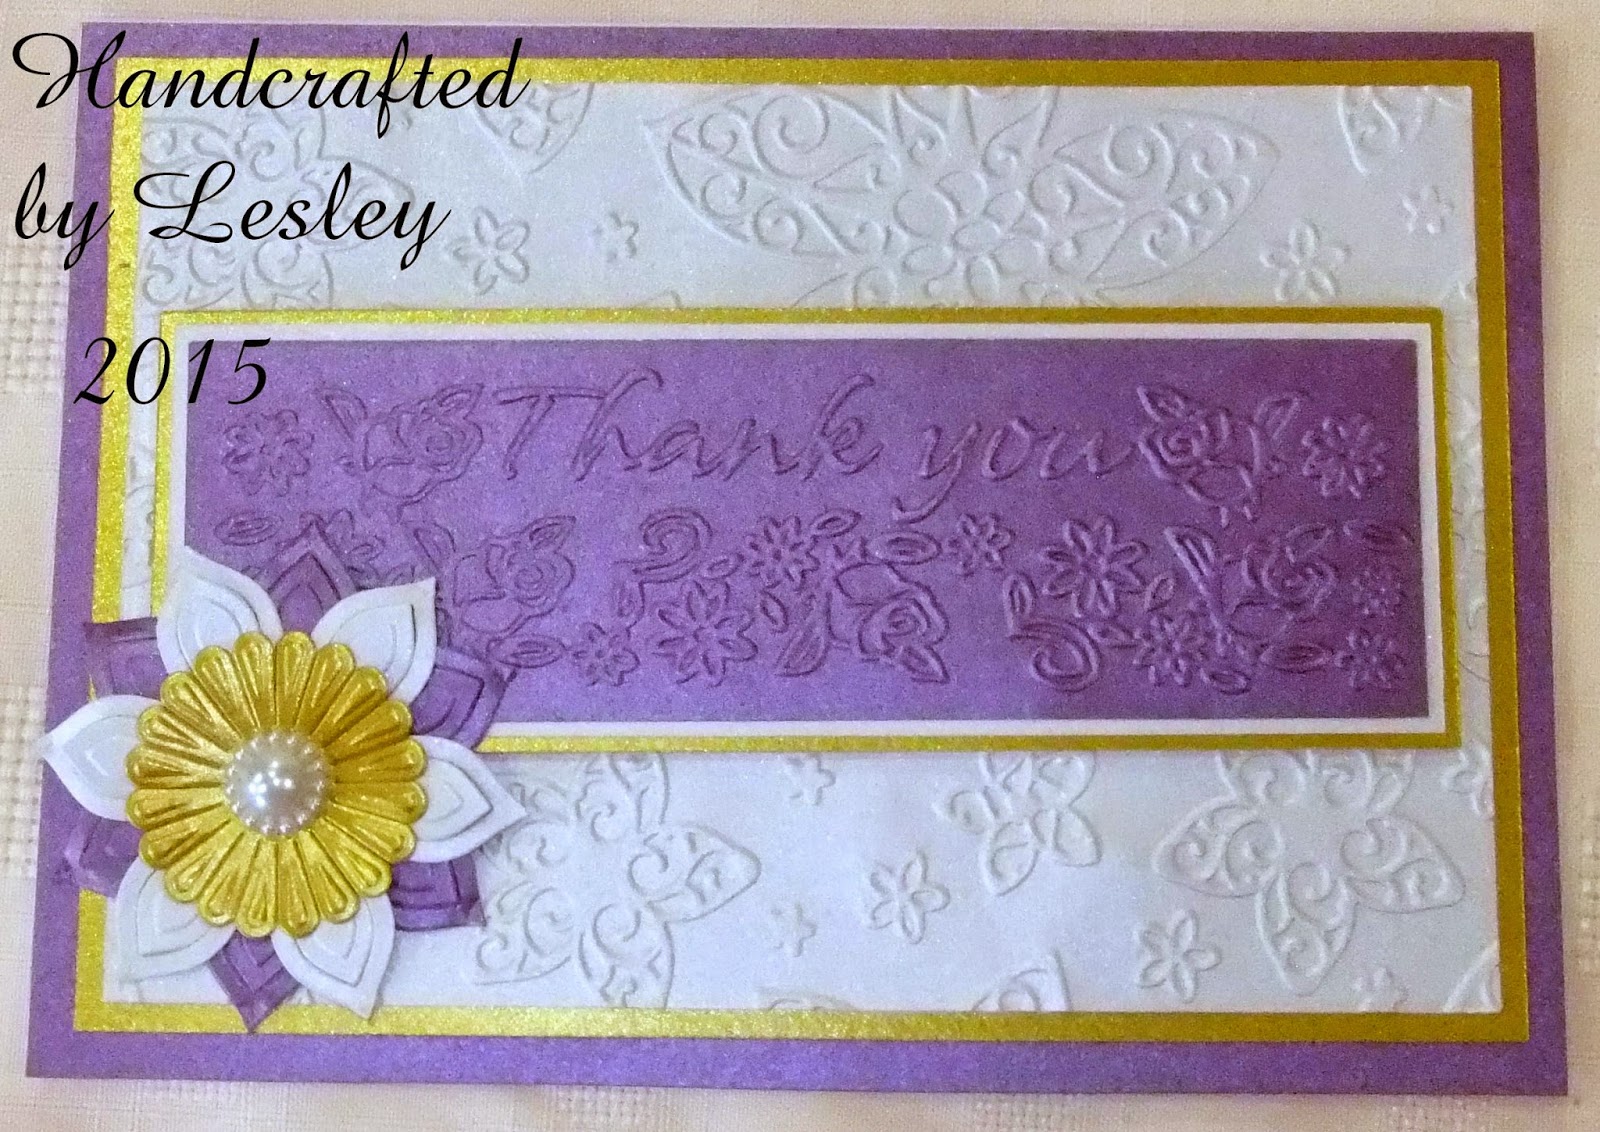
Today's cards are ones I made for my children to say thank you for all their gifts. I have tried to use lots of my scraps to make these cards hence the mix of colours and papers used.
I began by covering a 5 x 7 inch card blank with a piece of coloured paper. I then cut a piece of cream centura pearl with a Spellbinder's matting basics A, embossed it with Tattered Lace's Lacy Flowers embossing folder and matted it onto a piece of gold or silver centura pearl. I then attached it to the card base.
The sentiment has been embossed with an embossing folder which came free with this month's Cardmaking and Papercraft magazine. (Where using core'dinations card I sanded it back to reveal the core). I matted and layered the sentiment onto cream and gold or silver centura pearl and attached it to the card base with foam pads.
I then cut several Spellbinder's Anemone flowers from the paper used, layered it up and attached it to the card as shown. To finish I added a pearl to the centre of the flower.


Thank you for stopping by

Lesley

Thursday 1 January 2015

Top 5 cards for 2014

Good morning folks. 

I hope you have all recovered from the revelries last night.
Debby has done it again and would love to see your top 5 cards creations of 2014. After much deliberation here are my top 5 - 


Thanks for stopping by

Lesley